How do I use Google as an identity provider?
We support single sign-on using SAML2 (Security Assertion Markup Language) for enterprise clients.
Assuming single sign-on is included in your package, you can configure Google as your SSO identity provider. That way, your colleagues can authenticate using your Google Business account, meaning they don’t need to set up yet another password (in our system) and also giving you control over which people can sign in.
To start with, sign in to our dashboard. You will need to sign in using a password (at least one user must sign in using a password, in order to be able to add an identity provider). You will need to be a super-user (have the role of owner). If you do not, please contact someone within your organisation who does.
You should see an option in the main menu of our dashboard called Identity providers (possibly under More).
That should list any identity providers already configured. It is likely there won’t be any. Click the link to add a new one.
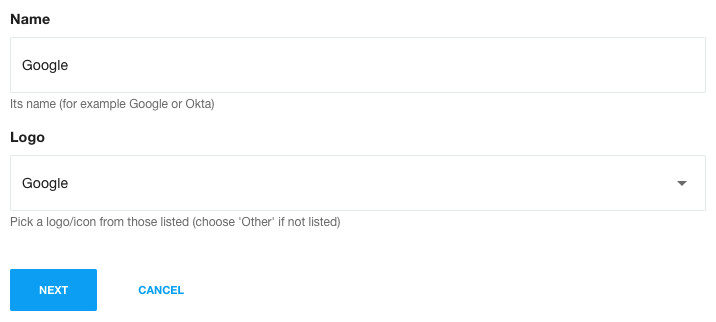
You will be asked to give it a name, and perhaps choose a logo to represent it. We have a logo for Google in the system already so you can just pick that:
Click Next and scroll down. You will see we need some details from your identity provider, and your identity provider will need some details from us. So you will be copying values to/from your Google app (in a moment).
To work on both while making it easy to switch betwen them, we recommend opening a new browser tab/window. In that, open your Google admin console: https://admin.google.com/ac/apps/unified.
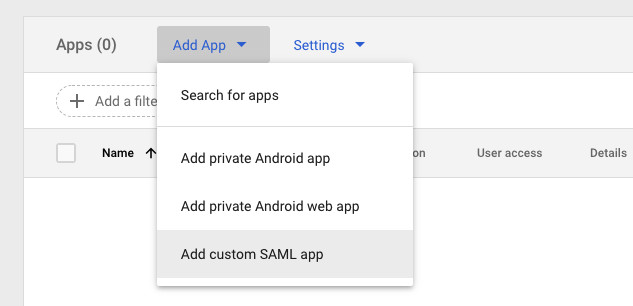
Create the app
In the Google admin console, click the blue link to ‘Add App’. Choose ‘Add custom SAML app’:
You will be asked to give the app a name. Enter something your users will recognise like Vidbeo signin.
The next screen has a download metadata button. Ignore that as our form wants you to copy the URLs across to it manually. So scroll down.
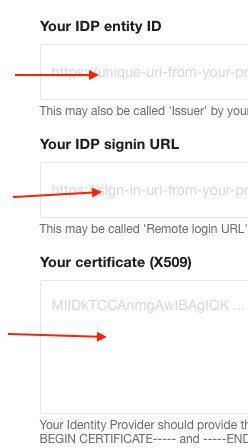
You will see the values for the Entity ID, SSO URL, and certificate. We don’t need the fingerprint value so you can ignore that.
We need all three of those copied to our form:
Don’t close or save our form yet. You’ll need to copy values from our form to Google’s form in a moment. So leave our form open.
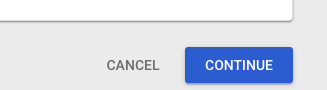
Switch tab/window back to Google’s form, and click ‘Continue’ at the bottom of it:
You’ll see Google now ask for some details from your Service provider (that’s us):
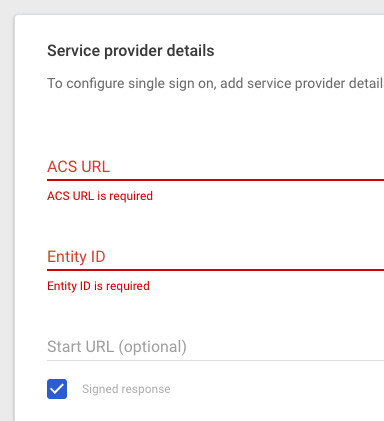
To get those values it wants, switch tabs back to our form, and scroll down. You should see we present the Entity ID and ACS URL (aka Signin URL) it is asking for. Copy both across to those two inputs in Google’s form.
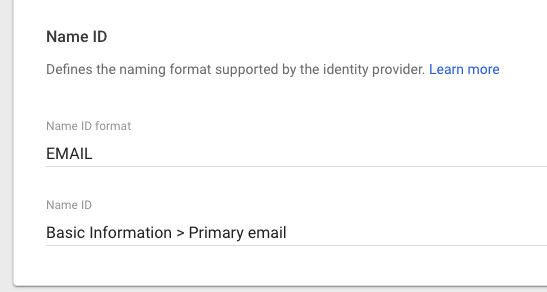
Now scroll down Google’s form and choose EMAIL as the NameID. That primary email is how we identify a user (the email address in your Google account needs to be the same one used in our video CMS for each user):
Click Continue:
We won’t add any custom attributes here. They can be used to pass a name, role or send_invite. However Google does not support using those unless added as Google Directory attributes.
So click Finish at the bottom of the Google form.
You are finished with our form too. So in your other browser tab/window, click Save at the bottom of it. That will save the URL, Entity ID and certificate you copied across earlier on.
If those values were all entered correctly, you should see a green success notification.
Enable the app
Having added the app, you now need to enable it within your Google account. Click on the words ‘User access’ you should see on its page (not View details):
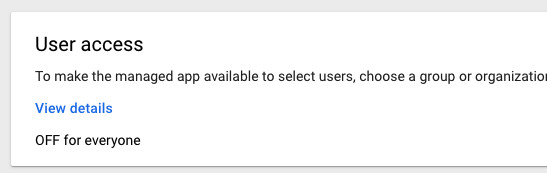
You will see this new app is OFF for everyone. So for your colleagues to sign in, you’ll need to either set it as ON for everyone or for one of your groups of users (in the left-hand menu):
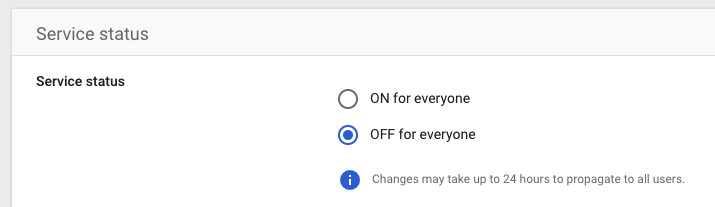
Click SAVE and after a minute or so the app should be updated. Though, as the text there says, it can take up to 24 hours for the change to propagate. So don’t worry if the app does not work to begin with.
Test it
First, sign out of our video CMS. As you are currently still signed in as the account owner and so that will not be a true test of a user’s experience.
Now in the Google tab you should still have open, if you click on the TEST SAML LOGIN link that will initiate a SAML request. However there is a problem. Your email address is set up to sign to our system in using a password. And not using single sign-on (SAML). As mentioned above, we need that to be the case in case there is an issue with your identity provider, else you would be locked out and unable to change its settings.
And so that request (to test the login) is rejected. That error is expected.
So to try your newly added Google app, you will need to use another email address.
You could try it with a colleague, or set up a temporary test email address. You just need an email address within your Google account (and that user needs to be part of the group you allowed access to the app in that User access panel earlier on).
Assuming a user with that email address does not already exist in our system, we may email them to invite them. That confirms their consent. When they then sign in, they will have the role of viewer. That lets them watch videos, but not manage or delete them.
If you would like them to manage videos you will need to edit their role. You can do that from the Users page in the dashboard. Simply edit the user by clicking on the small pencil icon to the right of their details.
And once that user does exist within our system, they can then use SP-initiated SSO. If they visit our normal dashboard signin page, and enter their email address, our CMS will recognise that they have previously been configured to sign in using single sign-on. And so rather than prompt for a password, instead will generate a SAML request to authenticate via your identity provider. So, Google in this case.
As ever, if you have any questions about this or any other aspect of our enterprise video platform, please don’t hesitate to email us at [email protected].
Updated: September 25, 2023