How do I configure single sign-on (using ADFS)?
Single sign-on (SSO) is quite a long, complicated process. However after completing the steps we describe below your users will be able to sign-in to the Vidbeo online video platform without having to enter a password (on our platform). All authentication is handled by your server. This is more convenient for your users - as it means they do not have to remember yet another password - and it means you have more control over who can use our platform.
Please note that this guide is designed for users whose identity provider is Microsoft’s ‘Active Directory’ (AD). If you are using a commercial identity provider such as Centrify or PingIdentity (one that uses SAML), please read How do I configure single sign-on (using SAML)? instead.
The aim
Once you have configured your authentication settings your users should be able to sign in to the Vidbeo platform without needing to set a password in our system.
Prerequisites
Windows Server 2008 or 2012 This guide uses images using Windows Server 2012 R2, however 2008 should be similar
ADFS Microsoft do not support web-login directly using Active Directory (AD). They added the Active Directory Federation Services (ADFS) role for this purpose. Microsoft have written a guide to installing ADFS if you do not have it installed already - installing ADFS is beyond the scope of this tutorial
Provisioned users Each of your users within Active Directory needs to have an ‘Email’ attribute defined, since that is how our platform identifies them
Get started
We suggest you start by remotely logging in to your ADFS server so that you can quickly and easily switch between the Vidbeo admin panel (which you will normally have open in your local computer’s browser) and your server’s management interface. The single sign-on process relies on both providers knowing about the existence of the other, so it is usually simplest to configure the two simultaneously, switching between them as you go.
Sign in to the Vidbeo video CMS dashboard using your email address and password (since single sign-on has not been configured yet, your account must have at least one user that is able to authenticate using a password). You should see an option labelled Identity providers in the main menu, likely under the More dropdown menu.
Click the link to add a new one.
Give it a name so that your users can identify it. If a logo option is not suitable, just choose ‘Other’ (we may need to show a logo if we ever need to show your users a list of multiple identity providers):
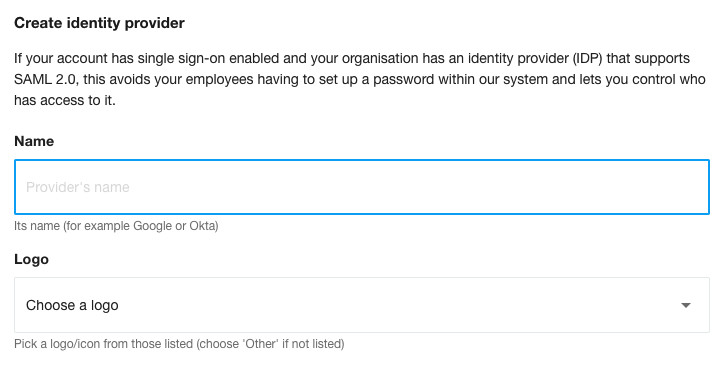
You may see a notification that asks for our identity provider’s details. You haven’t got those as yet and so won’t be able to submit this form. So scroll down.
If you scroll down, make a note of these two URLs:
The first one you will need to make a note of (we’ll label this URL one) is our ACS URL (also called our Signin URL). Within your Windows Server ADFS settings (later on), this will be the value you enter for ‘Relying party SAML 2.0 SSO service URL’.
The second one to make a note of (we’ll label this URL two) is our Metadata URL (which doubles as our Entity ID). Within your Windows Server ADFS settings (later on), this will be the value you enter for ‘Relying party trust identifier’.
Having noted those two URLs, now switch to your server’s desktop. Click on ‘Tools’ within ‘Server Manager’. Choose ‘AD FS Management’. A window should appear showing your current ADFS settings.
Before proceeding you will need to also note down two URLs from this section:
Click on the ‘Endpoints’ folder. You need to note down the value of ‘URL’ for the one that has a type of ‘SAML 2.0/WS-Federation’ - this is usually the very first row and normally this will be ‘/adfs/ls’ (we’ll label this URL three):
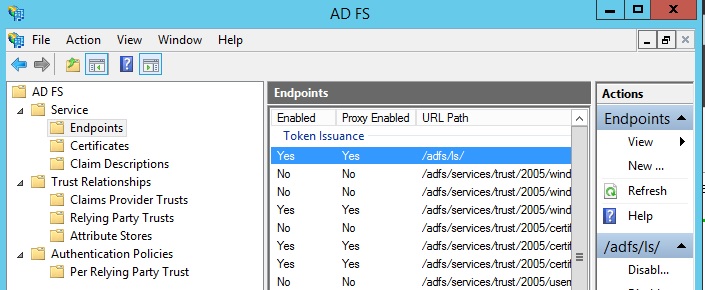
You will also need to make a note of the one with type ‘Federation Metadata’. Normally this will start with ‘/FederationMetadata’ (we’ll label this URL four):

At this point you should have four URLs noted down. Two from our platform and two from your server.
Configure relying party trusts
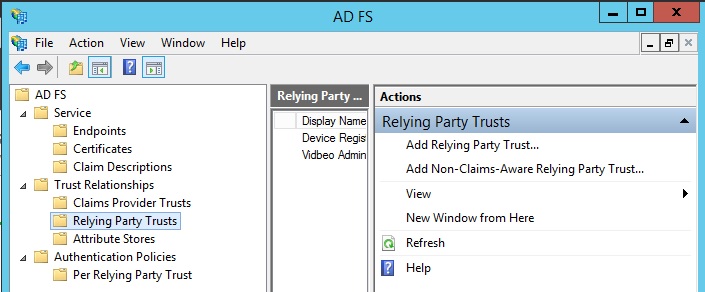
To establish a connection between your ADFS server and Vidbeo, you will need to add a ‘Relying Party Trust’ to your server. Click on the ‘Relying Party Trusts’ folder, and then on ‘Add Relying Party Trust’ - the first option in the ‘Actions’ menu:
This will start the wizard. So simply click on the ‘Start’ button.
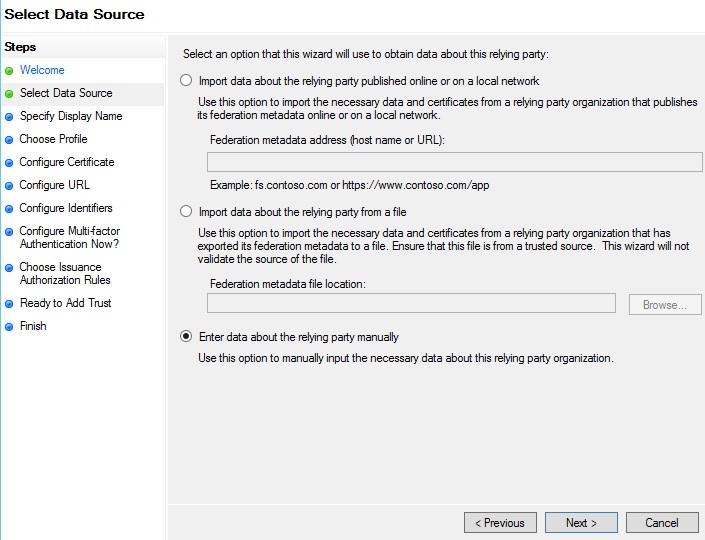
On the next screen, you will need to enter the details manually. So choose the last of the options:
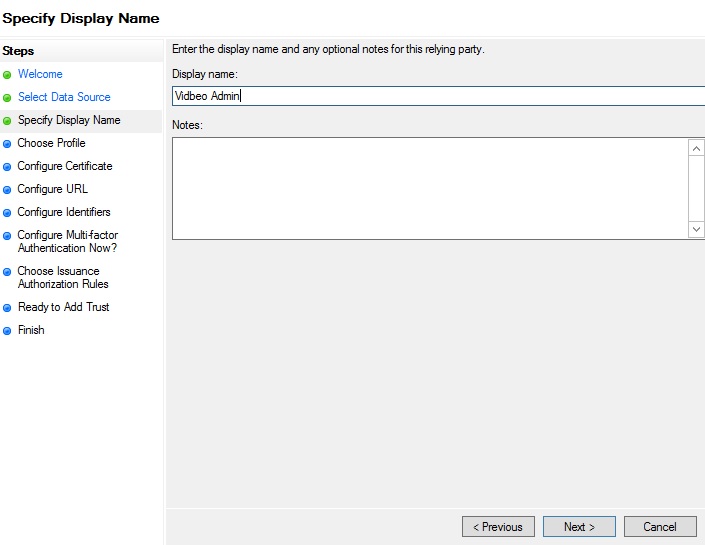
On the next screen, enter a name you will recognise (for example ‘Vidbeo Admin’), and any notes you would like to describe what this service is doing:
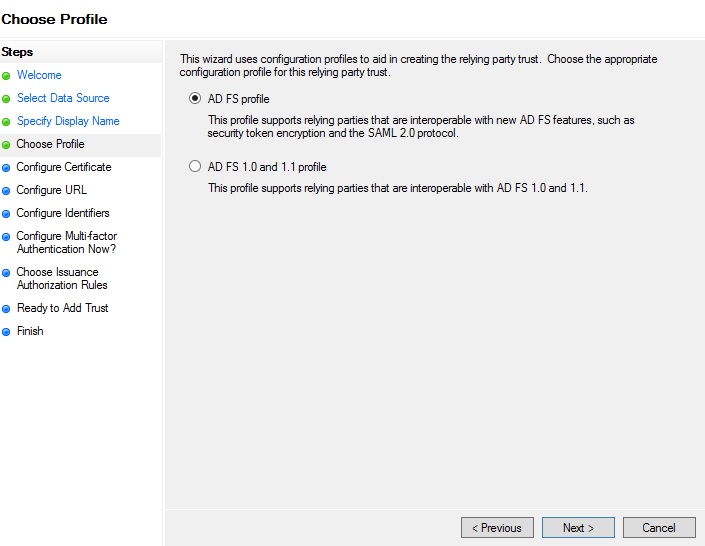
Leave the first option ‘AD FS profile’ as being the one selected on the next screen:
On the next screen, leave the certificate settings as their default values, and click ‘Next’.
On the following screen, tick the second box - you want to enable support for the SAML 2.0 protocol. You are then asked for a URL. This is the one we labelled one that you were asked to note earlier on (if you haven’t, switch back to our CMS dashboard and copy that URL from the ‘signin URL’).
Then click ‘Next’:

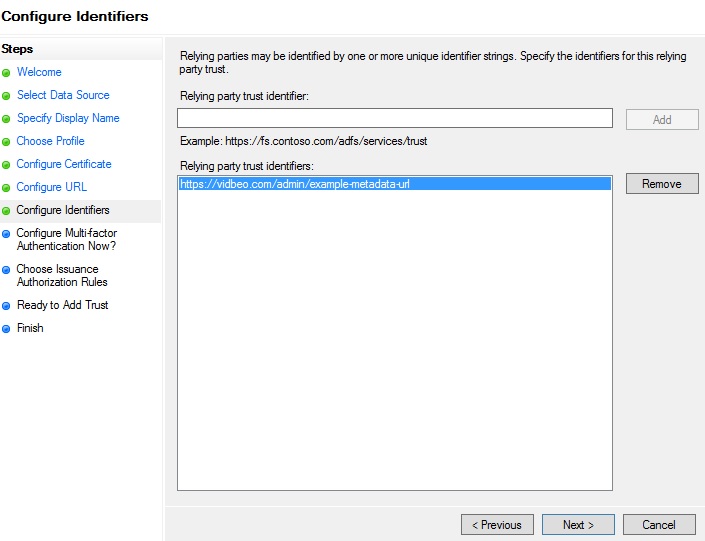
The next screen asks you for the ‘Relying party trust identifier’. This is the one we labelled two that you were asked to note earlier on (if you haven’t, this is the URL labelled ‘entity ID’ within the Vidbeo admin panel). Enter that URL in the box and click ‘Add’. It should appear in the box below, like in the image below. Then click ‘Next’:
The next screen asks if you would like to use multi-factor authentication. That is not within the scope of this guide, so for this tutorial we’ll leave that as the default option (‘I don’t want to’), and click ‘Next’.
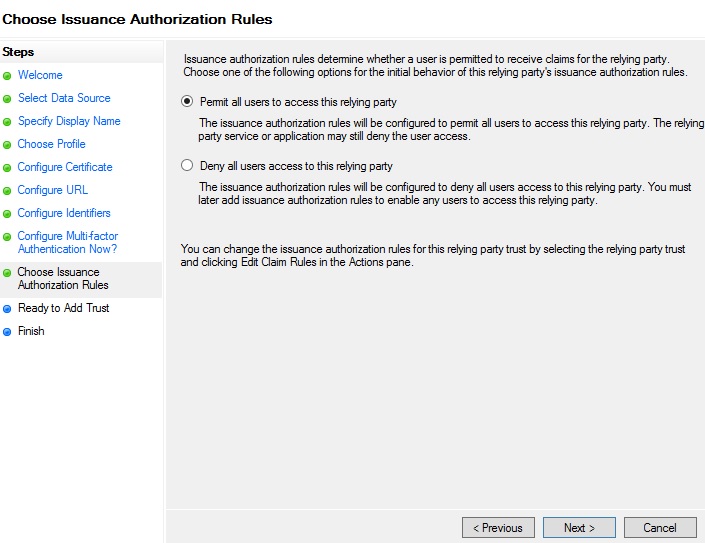
The final step is to choose the ‘Issuance Authorization’ rules. Leave the default first option selected:
… and then the last screen will ask you to confirm your settings. Proceed on and the last screen should hopefully confirm that the relying party trust was successfully added. Leave the checkbox within that dialog box as ticked, since you do want to open the ‘Edit Claim Rules’ dialog when the wizard closes. Click on the ‘Close’ button.
Claim rules
Each relying party trust contains rules. Within this dialog box you will provide them. So click on the ‘Add Rule’ button near the bottom-left of this panel. The wizard should start.
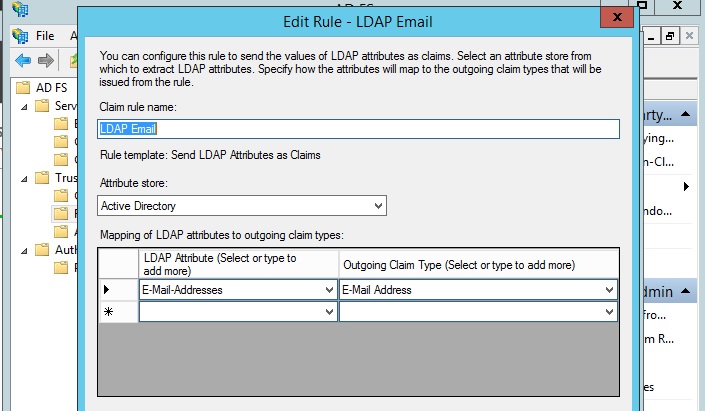
The first screen asks you to select a ‘Claim rule template’. Select Send LDAP Attributes as Claims from the menu and click ‘Next’.
The next screen should ask you to configure the rule. Enter ‘LDAP Email’ as the rule’s name, then select ‘Active Directory’ as the attribute store. Then, from the first column, choose ‘Email Addresses’ and from the second column choose ‘Email Address’. Since we need the user’s email address to identify them:
Click on ‘OK’ to save that rule. Now we also need another rule, so click on ‘Add Rule’ again’. This time however on that first screen, select ‘Transform an Incoming Claim’ as the rule template. Then click ‘Next’.
On this next screen, enter ‘Email Transform’ for the claim rule name. For the ‘Incoming claim type’, select ‘Email Address’. For the ‘Outgoing claim type’, select ‘Name ID’. And for the ‘Outgoing name ID format’, select ‘Email’. Leave ‘Pass through all claim values’ as selected (that is the default), and click ‘OK’:

You have now set up the two rules we need, so click ‘OK’ to close the dialog box.
Trust settings
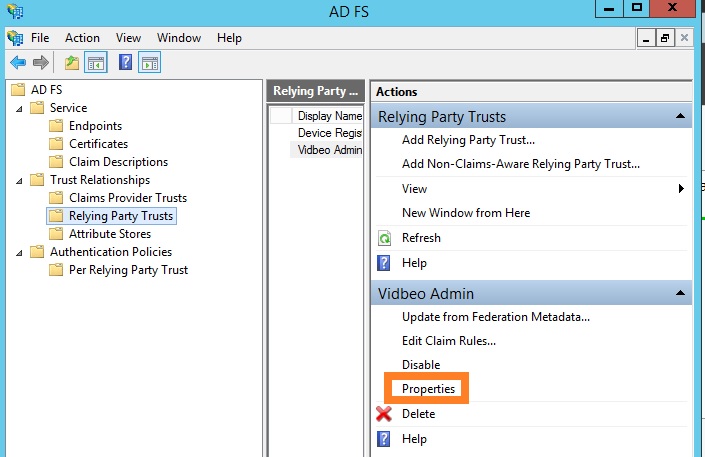
You now need to configure the ‘Properties’ of the ‘Relying Party Trust’. So click on the ‘Relying Party Trusts’ folder, and then click on ‘Properties’ (in the right-hand list):
In the dialog box that opens, click on the ‘Advanced’ tab, and then choose ‘SHA-256’ as the ‘Secure hash algorithm’ (not ‘SHA-1’).
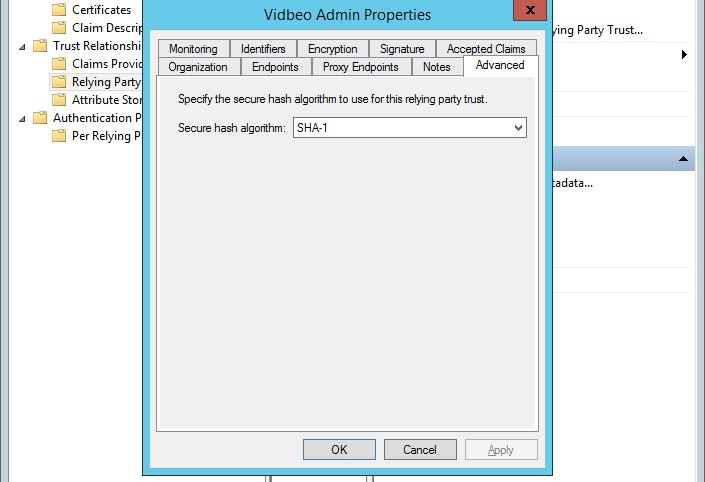
Click ‘OK’.
EntityId
Next, you will need to obtain the ‘EntityId’ (aka ‘Issuer’) for your ADFS service. You can find out what this is by opening your server’s metadata URL in your browser. If you remember, earlier on you made a note of a URL that we labelled four of type ‘Federation Metadata’ from the ‘Endpoints’ section. The full URL will need your domain in front, so will usually look like this: https://adfs.yourdomain.com/federationmetadata/2007-06/federationmetadata.xml. So if you enter that in your browser’s address bar, you should see a lot of text appear - it’s XML. You can ignore most of it. The only bit you need to make a note of is the attribute called ‘entityID’. You will need to provide that to us later on, so that our platform knows who is going to be sending authentication responses back to us. It should be in the very first line and look something like this:

X509 Certificate
The final piece of information your will need to provide us with is the certificate your server users to sign the responses it sends our platform. This is like an electronic signature that proves they have not been modified. To get this certificate, start by clicking on the ‘Certificates’ folder within the ADFS management panel. Then double-click on the ‘Token-signing’ certificate being used to sign your responses. In the picture below, you can see we have done this and it has opened a further dialog box showing the certificate’s details:
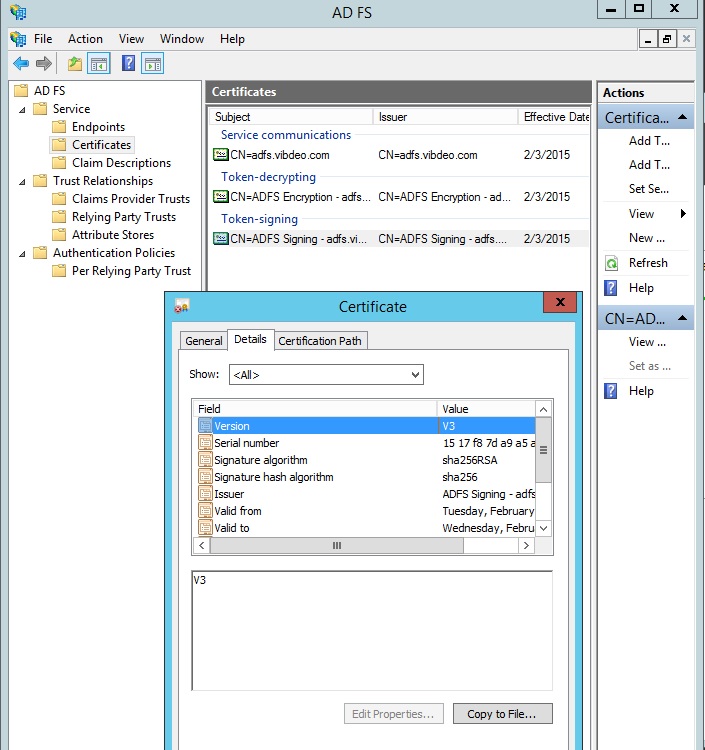
Within that dialog box, click on the ‘Details’ tab (as can be seen above), and then you will need to get the content of that certificate, so click on the ‘Copy to File’ button.
That should open yet another box, showing the certificate export wizard. Click ‘Next’ and you will be asked which format to export the certificate in. Choose ‘Base-64 encoded X.509’:

You will then be asked to enter a file name - you can click on ‘Browse’ to choose where to save the file. It can be anywhere you choose. So now your certificate should have been exported as a file in your chosen location. You can close all of the open dialog boxes.
Now you will need to open that certificate file (it is just a text file, so you can open it in Notepad) and make a note of its content - or just leave that Notepad window open ready to copy its content in a moment. If it has exported correctly, it should start with ‘-----BEGIN CERTIFICATE-----’ and then have a long series of letters and numbers.
At this point (barring any troubleshooting you may need to do at the end), single sign-on should have been fully configured at your server’s (as the identity provider) end.
Provide the data to us
At this point, our online video platform needs to know which URLs it should send the authentication requests to, who to expect them from and what certificate will be used to identify them. You now have all those details noted and so you will need to enter them in the form shown on our authentication page.
So with the identity provider form open within the Vidbeo admin panel (you might want to refresh your browser window just to make sure your session hasn’t timed out), scroll down the page and you should see some empty boxes.
The first box asks for your ‘entity ID’. That is the URL you will have earlier seen next to ‘entityID=’ within your ‘federationmetadata.xml’ file.
The next box asks for your ‘sign-in URL’. That is the URL you earlier noted - the one we labelled three. It is the URL that we request an authentication from.
The next box asks for your ‘certificate’. That is asking for the content of that X.509 .cer file you saved. It will start with ‘-----BEGIN CERTIFICATE-----‘. Paste the entire file into that box, exactly as shown in your Notepad window.
Click on ‘Save’.
If that works, you have finished. You have now configured our details within your identity provider and have configured your identity provider’s details within our platform. The two can now communicate to request and receive authentication data.
Test it
You can check it works by first signing in to the Vidbeo platform’s admin panel as normal (with your email address and password). Click on ‘Users’ within the main menu, and then create a user to try signing in as using single sign-on: click the add link, and provide a name and email address for them. You will need to choose ‘Single Sign-On’ when asked how this test user should be authenticated.
Since you will be authenticating against your Active Directory, the user whose email address you have picked to try it with will need to be a user within AD and must have their ‘Email’ attribute defined.
Now you have the email address of a user you would like to try signing in as - and they are known to your identity provider (meaning it will be able to authenticate them) - sign out of our dashboard so the system will treat the next request as being from a new user (else it will think it is you).
Now in the sign-in form, enter the email address of that new user.
Click on the ‘Sign-in’ button …
If everything has been configured correctly, you should be forwarded on to your identity provider’s ADFS sign-in screen. The URL in the address bar will usually look something like ‘http://adfs.yourdomain.com/adfs/ls?SAML …‘. You will then be asked to enter the email address and password for your test user - the password being the one that is linked to that user in AD, not our platform. Since they do not have a password within our platform.
If you enter the correct password, when you click on that ‘Sign-in’ button, ADFS should confirm those details are correct and so will send its response to our platform, telling it that the user is authenticated. Our platform sees that request, and forwards them on to their home page within our CMS. So they should see our UI.
Troubleshooting
If any part of the process does not work, the first thing to check is that you have followed each step of this guide - as this is the procedure we followed when producing the video at the top of this page. If you have, please confirm none of the following three issues are the cause.
Enhanced security configuration
Depending on your browser’s security settings, if you are using Internet Explorer and have ‘Internet Explorer Enhanced Security Configuration’, you will see a pop-up warning asking if you want to trust ‘vidbeo.com’, along with a domain we use ‘cdnjs.cloudflare.com’. Simply click on the ‘Add’ button within those dialog boxes to proceed.
Forms authentication
If this is the first time you are using single sign-on with this server, it is likely you will see an error when you first try to sign-in using single sign-on. This will have a not-very-helpful message provided by Microsoft, with a long ‘ActivityId’ identifier (it happens within the ADFS-hosted page). You will need to check that ‘Forms Authentication’ is enabled, since, by default, it usually isn’t - and that means it is not possible for a user to sign-in using a form such as this.
To confirm that ‘Forms Authentication’ is enabled on your server, you will need to open your ‘Server Manager’ panel and then click on ‘Tools’, and then on ‘AD FS Management’. Click on ‘Authentication Policies’ and then under ‘Primary Authentication’, ‘Global Settings’, ‘Authentication Methods’, click ‘Edit’. In the box that pops up, you need to have a tick next to ‘Forms Authentication’ in both extranet and intranet panels. If not, that will be the cause of that error and single sign-on simply will not work. So tick that box and click ‘OK’.
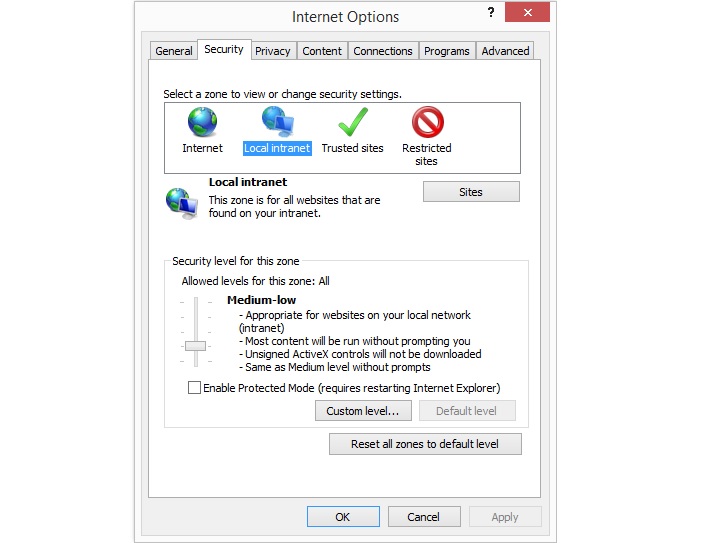
Intranet zone
The domain you are using ADFS with (usually adfs.yourdomain.com) needs to be part of the ‘Local intranet zone’ in each browser it is being called from. If you are using Internet Explorer, click on ‘Tools’ (or the small icon of a cog in the top-right of the window) then on ‘Internet options’. In the box that pops up, click on the ‘Security’ tab, then on ‘Local intranet zone’, then on the ‘Sites’ button. Click on ‘Advanced’. In the ‘Add website to this zone’ section, enter the domain you are using ADFS with (e.g. https://adfs.yourdomain.com), and click on ‘Add’. Having done so, click on ‘Close’ and ‘OK’.
Integrated Windows authentication
Within your browser’s ‘Internet Options’ panel - possibly still open if you have been editing the previous setting - click on the ‘Advanced’ tab. Scroll down. Check that under ‘Security’, the box labelled ‘Enable Integrated Windows Authentication’ is ticked. If not, tick it and click ‘OK’.
If you continue to have problems, please email [email protected] and we’ll do our best to help.
Updated: September 25, 2023